1. Reboot your Mac into Recovery Mode by restarting your computer and holding down Command+R until the Apple logo appears on your screen.
  2. Click Utilities > Terminal.
  3. In the Terminal window, type in csrutil disable and press Enter.
  4. Restart your Mac.

Source : How do I disable System Integrity Protection (SIP) AKA « rootless » on Max OS X El Capitan (10.11)?

Si vous avez des soucis avec MySQL et Python sous Mac El Capitan…

Ça fait un moment que je lute contre toutes les notifications et autres bip bip qui me coupent tout au long de la journée.
Au début, j’aimais bien. J’avais l’impression de faire parti de quelque chose, d’un groupe, d’une communauté. Mais au final, c’est juste épuisant.

Du coup, pendant l’été, j’ai fait le tri dans ma boite mail. Je me suis désinscrit à toutes les newsletters que je ne lisais pas ou auxquelles je ne m’étais jamais abonné, avec gmail (oui, j’utilise encore gmail), on peut décider de recevoir certains emails dans des onglets spécifiques, ce qui fait que seuls ceux qui arrivent dans la boite principale déclenchent une notif.
Déjà, rien que ça, j’ai diminué de pratiquement 50% mes notifications.

Facebook, je ne l’utilise pratiquement pas, j’ai donc rarement des notifications, je suis juste alerté quand il se passe quelque chose sur l’une des pages que je gère.
Facebook… Parlons-en. Plus je regarde ma timeline, plus j’ai l’impression de me retrouver devant TF1… Du coup, ça fait un peu comme la TV en général, j’arrête.

Twitter, bon, là, c’est mieux que TF1, mais je n’y vais que rarement, j’ai grandement baissé mon utilisation. Plus trop le temps depuis plus d’un an (un espace de coworking à monter, ça prend du temps), du coup moins de veille… Bref.
Vu que j’y vais moins, j’ai moins de notification.
Logique.

J’ai aussi supprimé toutes les notification sur mon poste de travail, plus d’email qui me popup, la messagerie instantanée je la garde par contre (sinon, c’est plus vraiment instantanée, mais vu que c’est pour le boulot…).

Et depuis quelques semaines, je teste la méthode ultime. Le téléphone en mode silencieux.
Je ne regarde l’écran que lorsque j’y pense (des fois, pas avant midi, oui, je peux passer toute la matinée sans regarder mon téléphone), je ne suis pas perturbé, je peux rester concentré sur mon taf, et au final, je suis plus productif, et je suis largement moins fatigué à la fin de la journée.

Il m’aura quand même fallu beaucoup de temps pour comprendre que les alertes, c’est la mort assurée et le stress permanent.
Avant l’été, quand mon téléphone bipait, j’étais dans un état de stress incroyable. Depuis, vu qu’il ne fait plus de bruit, ben je me sens beaucoup plus serein, détendu.
Et toi, tu es détendu ?
Oh oui… Je suis dé-ten-du…

Je garde quand même mon téléphone à portée de vue, au cas où quelqu’un me téléphonerait, mais ça, c’est plutôt rare…
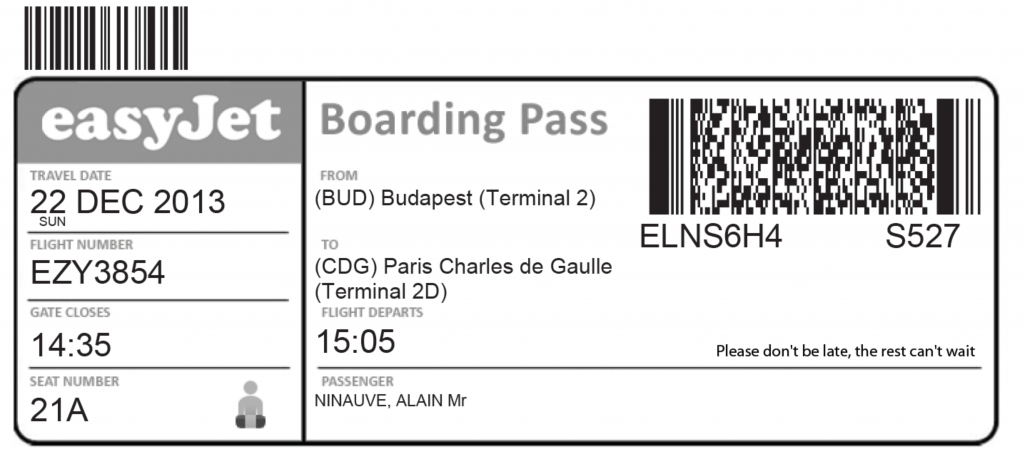
Are you looking for an alternative DNS provider that is open and democratic, are you concerned about censorship?

Les serveurs DNS de ma boite sont toujours à la ramasse, du coup j’étais passé sur les DNS de Google.
L’autre jour, je suis tombé sur OpenNIC, un service qui propose des serveurs de DNS ouverts, qui respectent la neutralité du net, qui ne sont pas censurés par les gouvernements…

Bref, en 3 clics c’est fait. J’utilise depuis une semaine et ça marche nickel.

Je regarde pas mal de séries, et les séries sur les nouvelles technologies (les bonnes séries) sont assez rare.

Florian Reynaud et Morgane Tual ont fait un top 5 des meilleures séries dans le domaine, j’en connais 4, et j’en suis 2 (Black Mirror et Silicon Valley)

Leur liste :

  • Black Mirror
  • Halt & Catch Fire
  • Mr Robot
  • Real Humans
  • Silicon Valley

Vous avez d’autres séries à recommander ?

De Urvoas, à Cazeneuve en passant par Valls ou Hollande, sans oublier ces petits députés idiots de villages, qui ont voté sans réfléchir; tous sont les complices du terrorisme, et c’est ce que l’Histoire retiendra. Ces hommes et femmes politiques avancent dans la même direction que les poseurs de bombe et les décapiteurs, main dans la main, pour nous priver de nos libertés, nous terroriser, nous dire quoi penser et comment le penser.

Et sachez le, ce 23 juillet 2015 n’est que le début du cauchemar. Le pire reste à venir.

Lire l’article sur korben.info

Pour imaginer un peu ce que pourrait devenir notre état dans un futur proche si nous laissons faire les choses, je vous recommande la lecture de la nouvelle « Mâtin Brun » de Franck Pavloff.
C’est court, 3 pages, mais ça fout la trouille.

Jour historique.

It has not been possible to captures images of the entire sunlit side of Earth at once since Apollo 17 astronauts captured the iconic Blue Marble photograph in 1972. While NASA has released other blue marble images over the years, these have mostly been mosaics stitched together with image processing software—not a single view of Earth taken at one moment in time.

Voici pour info la première image de la Terre prise en 1972

earth-1972

FranceTHD a mis en place un observatoire permettant de visualiser les débits et les réseaux filaires (ADSL; câble; fibre optique FttH) disponibles dans son département, sa commune, son quartier. Il présente également la couverture du territoire par les réseaux hertziens (satellite et WiMAX/radio). Mis à jour chaque trimestre, il a pour objectif d’assurer une transparence dans le suivi des déploiements et d’évaluer le respect de la couverture intégrale du territoire en très haut débit d’ici 2022.

carte-debit-chambery

J’ai fait la recherche pour Chambéry, on voit clairement les deux zones qui sont fibrées (en rouge foncé). J’habite en plein dans la zone fibrée, et pourtant, j’ai choisi (pour le moment) de ne pas m’abonner à la fibre.
Par contre, au mug, on a la fibre, et on a même pas réfléchi si on la prenait ou pas. Il la fallait.

Pour faire cette carte, l’observatoire utilise des données provenant de l’open data.
Un peu dommage d’utiliser Google Maps plutôt qu’OpenStreetMap pour le coup…

C’est l’été, c’est la canicule, et nous, on prépare la rentrée de Chambé-Carnet, avec son lot d’événements : 3 conférences et 4 apéro.

Je suis tombé sur cet article au mois je juin. Mois qui était ultra chargé à Chambéry aussi. J’ai réussi a enchainer 3 événements et à en refuser 2 autres dans la même journée…

Une bonne piqure de rappel, avec de bons conseils. On va s’en remémorer pour la prochaine réunion.

Pratiquement 4 ans que j’ai mon Galaxy S2.
il marche encore assez bien, mais l’écran est devenu petit à la vue des standards de maintenant et mon usage a changé aussi, je m’en sers beaucoup pour prendre des notes, gérer mes emails, etc…

Moi qui disait il y a quelques années que je n’aurai jamais de smartphone, c’est raté…

Bref, je suis passé au Galaxy Note 4, le coup du stylet et le grand écran me plaisait assez.
Manque de bol, Bouygues ne m’a pas mis de micro-sim dedans, du coup, ben, je suis en WIFI pour le moment…
J’ai appelé le service commercial, ils m’en envoient une le plus vite possible, j’espère l’avoir en début de semaine.

J’ai pas encore beaucoup testé le stylet, j’ai juste tenté de sélectionner du texte dans une image et fait une reconnaissance de caractère, ça a plutôt bien fonctionné. Seul 2 lettres n’ont pas été reconnus, un « i » et un « g ».

Du coup, c’est Marlène qui va récupérer mon S2 dans quelques temps, il faudra que je le réinstalle au propre avant…
En fait, elle récupère toujours mes vieux téléphone… On recycle tout !

Si vous avez des retours ou des trucs et astuces sur le Note 4, je suis preneur !

On m’a fait passé ce tutoriel il y a quelque temps, il vient d’un site de partage de fichier assez connu dans le milieu.
Je rip mes CD pour deux raisons :

  1. Avoir une copie numérique au cas où mon CD ne soit plus lisible
  2. Pouvoir l’écouter grâce à mon serveur de musique avec mes appareils squeezebox.

Le texte est en anglais, je ne l’ai pas traduit.

Summary

This guide is an introduction that will teach you to configure XLD correctly, to rip a CD, and to check ripping (extraction) logs for a good CD rip. It is intended primarily as a beginners’ guide, so some more advanced features are (currently) omitted.

The official software page describes XLD:
X Lossless Decoder (XLD) is a tool for Mac OS X that is able to decode/convert/play various ‘lossless’ audio files. The supported audio files can be split into some tracks with cue sheet when decoding. It works on Mac OS X 10.3 and later. XLD is Universal Binary, so it runs natively on both Intel Macs and PPC Macs.

We STRONGLY recommends version 20100704 (04 July 2010) or newer. If you are using an older version, then go to XLD menu > Check for Updates to make sure you have the latest version.

This guide was made using the latest version of XLD available at the time. XLD version 20130720 (144.0). Placement of options may vary depending on the version, but the options required to create a proper configuration remains the same.

Download

XLD Application

Download XLD builds and source code from the following links:

Logchecker Plugin

an Automator Application
There are several methods of adding LogChecker functionality.

  1. You can manually apply the plugin by putting the XLDLogChecker.bundle file into ~/Library/Application Support/XLD/PlugIns. You can go to this folder by using the « Go to Folder » option (cmd+shft+G) from within Finder and pasting the full path into the resulting text box. You can obtain this file via the XLDLogChecker-20121222.zip file from any of the sites listed above.
  2. Alternately, you can download and run  that will download the file and install the bundle file for you. (ad-filed mirror: )

Once installed properly, you will see an option for « Log Checker » under the XLD menu. You will most likely have to restart XLD for the Log Checker to take effect.

Configuration

It is very important to properly configure XLD for lossless (FLAC) rips so that the ripping log will score 100% on the logchecker. This guide will also cover encoding lossy formats (such as MP3), as well.

1. After checking for updates go to XLD menu > Preferences, or hit Command-, (Command is the key with the Apple logo).

xld-1-preferences

We will configure the General settings tab with the assumption that you will rip a disc to FLAC (and then transcode the FLAC files to MP3 if you desire).

xld-2-general

  1. The Output directory is set manually each time you rip a disc. If you wish to have a default directory for transcoding, then you may set it now.
  2. Set Character encoding of cuesheet to Unicode (UTF-8).
  3. Check the Automatically check for updates box. XLD will check for new versions whenever it is launched. The XLD developer frequently releases updates, so checking this box is highly recommended.
  4. The Maximum #Threads setting is the number of simultaneous audio conversions that XLD will perform. If you have a multi-processor or multi-core Mac, you should change this setting from 2 to however many your system has. It should be set automatically.
  5. DO NOT check the Correct « 30 samples moved offset » problem box. In brief, if you have the box checked, then your CRCs will not match those of EAC or another ripper. There is no reason to check this box if you are ripping a CD. (For a more technical explanation, see this thread. This option can partially fix a problem with EAC’s offset detection, but it is irrelevant for our purposes.)

xld-3-general

FLAC: We will begin with with General tab. Click on the Output format drop-down menu, select FLAC, and click the Option button. Drag the Compression Level slider to High, and uncheck « Allow to embed cue sheet ». Then click OK.

2. This is the File Naming Tab

xld-4-file-naming

  1. There are several options for filenames and directory names. It is ALWAYS recommended to include, at minimum, track number and track title in the filenames. If you upload a torrent missing these, then someone may re-name the files and trump your torrent. (A meaningful directory name is also required: the minimum is to include the album title. If you upload a torrent with a root directory name that omits the album name, then someone may rename the folder and trump your torrent.)When ripping or converting, consider using one of the following:
    %A – %T (%y) [%f]/%n %t
    or
    %A – %y – %T [%f]/%n %t(Click the Custom radio button to enter text.) Either of these codes will create a folder for you and put the tracks in it. Copying the code from this page then pasting it into the field is recommended to prevent code input errors.Note that %f isn’t always all that useful; ‘LAME MP3’ is not as descriptive as ‘V0’ as you’ll have to manually correct that if you rely on the %f option. However, XLD will create one folder for each format you are ripping to multiple formats! A workaround to this previous limitation is to set the Output format (under the General tab) to Multiple Formats, then each of the output formats (%f) can be named to appropriate names such as V0, V2, 320K LAME, etc.

    For compilations, you could use
    %A – %T (%y) [%f]/%n – %a – %t
    which adds the track artist to each track name.

    You can choose from the following options. Forward slashes (i.e., / )will be translated to new folders:
    %D – disc number
    %I – disc id
    %A – album artist
    %T – album title
    %a – track artist
    %c – composer
    %f – format (the same name as in the ‘Output format’ dropdown, so ‘FLAC’ or ‘LAME MP3’, etc.)
    %g – genre
    %i – ISRC
    %m – MCN
    %n – track number
    %t – track title
    %y – year

  2. Set the filename option to Overwrite.
  3. In this tab, you may also specify character replacements, which are useful since certain operating systems have a restricted character set that cannot be used in file names. While OS X may handle these characters perfectly well, other operating systems, such as Windows, will not allow for these characters in the file names.

3. Now we move on to the Batch tab.

xld-5-batch

It is useful when converting nested directories, such as one folder that contains two more folders with tracks you wish to convert. You can drag the main folder onto XLD’s dock icon and it will batch-convert the folders.

  1. Check the Preserve directory structures box.
  2. Set Subdirectory search depth to 0.
  3. Optionally, check the Automatically split file with embedded cue sheet box. Single-track rips are beyond the scope of this article.

4. The CDDB tab can be left alone. You may edit the settings if you feel so inclined.

xld-6-cddb

5. In the Metadata tab, you choose whether or not you want to embed album artwork into files.

xld-7-metadata

The only rule concerning embedded artwork states that embedded images should be kept below 512KB. To avoid the problem entirely, and to give downloaders the choice to handle tags as they want, you may simply choose to not embed album artwork.

  1. Uncheck the Embed cover art images into files box, if you choose.
  2. Uncheck the Set the Compilation flag automatically box.
  3. Edit tags before convert will force XLD to prompt you to review and edit tags before making any conversions, including ripping CDs. Check the box if you choose.
  4. It is generally okay to leave the Preserve unknown metadata if possible box checked, but you may disable it if you choose.

6. CD Rip

xld-8-cdrip

These settings are crucial to obtaining an exact copy of a disc, and the importance is quantized in the logchecker’s assessment of your extraction log. Read more about the automated logchecker in this wiki article

  1. Use the XLD Secure Ripper Mode.
  2. XLD should be able to read your drive’s Read sample offset correction value automatically. Click the black triangle next to the field to display your drive(s). You can look up your drive in AccurateRip drive offset database. NOTE: Matsushita brand drives are listed as Panasonic in the AccurateRip list. Normally, however, XLD can find your drive’s offset, so this step is usually unnecessary.
  3. If your drive’s read offset is correct, then XLD will try to search the AccurateRip database to verify the integrity of your rip by comparing it to the rips of other people. See http://www.accuraterip.com/ for more information. DO NOT check the « Treat AccurateRip mismatch as an inconsistency in log » box.
  4. Always save a log file and cue. Without a log, there is no easy way to verify the quality of your rip.
  5. Verify suspicious sectors. The logchecker will deduct points if this box is unchecked. Without this setting, your log score will be decreased by 5 points.
  6. Always enable Test before copy (also called test-and-copy).
  7. Check the Scan ReplayGain box. Regardles of whether you prefer ReplayGain tags in your music files, ReplayGain should be enabled here. XLD will not add ReplayGain tags to the FLAC files, but it will include peak level information in the ripping log. This is used to help differentiate the different pressings of discs.

Ripping

Now that we have configured XLD, we can finally begin ripping CDs. Once you have XLD configured once, you can jump straight to here each time you want to rip a disc.

  1. Insert the CD into your drive and open XLD (not necessarily in that order).
  2. Go to File menu > Open Audio CD
  3. XLD will now detect pre-gaps for the disc.
  4. Add tags. Go to CDBB menu > Query Items > and choose the options you would like. It is recommended to not embed artwork, as it may be of low quality or incorrect. It is simplest to include the album cover as an image in your torrent directory, e.g. a cover.jpg or folder.jpg.

Then, go to CDBB menu > Get CD Track Names to check MusicBrainz and/or FreeDB for tags.

If tags are not found or are incorrect, then manually enter the correct tags. Do not skip this step, as a minimum tagging standard is required by rule 2.3.12. In the image below, tags cannot be found. Select all the tracks (Command-A), and then go to File menu > Edit Metadata, or hit Command-I.

You can now enter the artist, album title, year, and disc number automatically for all tracks. Click OK when done.

Then, click the first track to select it, and then hit Command-I again (or go to File menu > Edit Metadata). Enter the correct track title for the first track, then click Next, then enter the correct track title for the second track, then click Next, then…. Repeat until all track titles are entered, and click OK.

At the top of this screen before you rip you should select the option « Include pre-gap except for HTOA. » If a CD you rip has hidden track one audio, or a track hidden in the pre-gap (or even simply some empty space as is quite common, and illustrated in this example), this option will cause XLD to rip like EAC and not include the pre-gap audio in the first track.

Note: If you need to extract the hidden track one audio (HTOA), rip the track again using the option « Include pre-gap for all tracks. » This will make XLD rip starting at sector 0 where a hidden track would be instead of where the regular first track begins. Ripping as a single file is another way to extract pre-gap audio, but should be avoided if you are doing just a normal CD rip, as a single file rip will not be scored 100%. It is suggested you do this after copying your first rip elsewhere as not to over-write anything you’ve already done. You may then split the ‘Track 0’ out from this track 0+1 file using other means and may include it in your upload.

5. Click open, and XLD will begin extraction. A new window named Progess will appear. XLD will rip the first track once (as a test), and then rip it again (as the copy saved to your disk). The CRCs for both tracks will be written to the log file and checked against the AccurateRip database, if your disc is found. Extraction may take anywhere from 30 minutes to over an hour, depending on your drive, the length of the disc, and the condition of the disc.

When the extraction has finished, a new window named Log appears. Because you have told XLD to always save a log file, you can close this window. The log file will appear in same folder as the FLAC files and cue sheet.

Log Analysis

Main things to look for

The main things you need to look for are log errors, the test CRC hash, the actual rip CRC hash, and AccurateRip results to justify the CRC values from the test and rip.

LOG CONSOLIDATION WARNING

THIS IN NO WAY MEANS that you are free to consolidate logs by opening up your original rip log and substituting the faulty rip results with the re-ripped track results. When XLD outputs your original log and any additional track-specific rip logs, DO NOT OPEN THE LOGS. Include all logs for this album in your torrent folder and upload each log individually to the site on the upload page. The site will have no problems reading these logs correctly.

AccurateRip

AccurateRip may or may not confirm whether an album has been ripped properly: there are false negatives from previous poor submissions, false positives (rarely) from identical bad rips, and many, many albums with no data at all. This is why it the « Treat AccurateRip mismatch as an inconsistency in log » box should be left unchecked.

AccurateRip should always be enabled. Not only does it mean that you have configured (some) settings correctly, it should also mean that your drive’s offset is correct. AccurateRip matches in the ripping log can suggest that your rip is « accurate ». If you have enabled AccurateRip and the CD you are trying to rip is in its database, [AR] will appear in the title bar for an opened disc.

XLD cannot currently submit rip results to the AccurateRip database.

Errors (CDParanoia III 10.2 Ripper Mode)

Sometimes you may get errors in ripping your tracks. Some are still acceptable if you only see a few of them. Other errors are not as good, and they indicate unrecoverable problems with your rips. Because XLD uses CDparanoia, logs may sometimes list a number of errors, and they still report the « No errors occurred / End of status report » message at the end. This is similar to a proper EAC rip that reports one or more track quality values of under 100%.

Major errors

If you have any of these, you should re-rip those tracks with the errors.

  • Read error
  • Skipped (treated as error)
  • Inconsistency in error sectors

Acceptable errors

These errors are common and most often can be fixed by cdparanoia. They will not affect the quality of your rips. These are labeled as « (maybe fixed) » in the log.

  • Edge jitter error
  • Atom jitter error
  • Drift Error
  • Dropped bytes error
  • Duplicated bytes error

Conclusion

If your CRCs match up and you don’t have any of the « bad » errors that are listed above, then your rip is considered good. AccurateRip isn’t that relevant to your rip as things can interfere with the quality of AccurateRip results as stated above. A rip that only has Edge, Atom, Drop, Drift, or Dupe « maybe fixed » errors is most likely clean. For a detailed discussion of XLD’s error reporting, see this thread at HydrogenAudio.

Errors (XLD Secure Ripper Mode)

Sometimes you may get errors in ripping your tracks. Some are still acceptable if you only see a few of them. Other errors are not as good, and they indicate unrecoverable problems with your rips. Since the XLD Secure Ripper reports additional information on rip quality, logs may sometimes list a number of errors and still report the « No errors occurred / End of status report » message. This is similar to a proper EAC rip that reports one or more track quality values of under 100%.

Major errors

If you have any of these, you should re-rip those tracks with the errors.

  • Read Error
  • Damaged Sector Count

Acceptable errors

These errors are common and most often can be fixed by XLD. They will not affect the quality of your rips. These are labeled as « (maybe fixed) » in the log.

  • Jitter error (maybe fixed)
  • Retry sector count

Conclusion

If your CRCs match up and you don’t have any of the « bad » errors that are listed above, then your rip is considered good. AccurateRip isn’t that relevant to your rip as things can interfere with the quality of AccurateRip results as stated above. A rip that only has either jitter errors or retry sector count errors is most likely good. Refer to the XLD official release notes for more detailed explanations of each error (under Version 20101115).

Checking Log Integrity with LogChecker

For logs which have the signature, log tamper detection can be done with XLD version 20121027 or later (the plugin must be installed). To perform a check, run XLD and choose XLD menu -> Log Checker. Checking is done quickly and the result appears when you drag files to the log checker window.

Also, by using the command line version,
% xld –logchecker logfile.log
will check files.